172 lines
5.1 KiB
Markdown
172 lines
5.1 KiB
Markdown
Galada - Easy & Simple Theme for Personal Blog
|
||
======
|
||
Galada is an easy and simple theme for Jekyll. Dark colors, give it a special exquisite look. A careful approach to design and features make it an ideal solution for a personal blog.
|
||
|
||
* * *
|
||
|
||
Table of Contents
|
||
-----------------
|
||
* [Features](#features)
|
||
* [Demo](#demo)
|
||
* [Deployment](#deployment)
|
||
* [Posts](#posts)
|
||
* [Disqus Comments](#DisqusComments)
|
||
* [Instagram](#instagram)
|
||
* [Google Analytics](#GoogleAnalytics)
|
||
* [Update favicon](#UpdateFavicon)
|
||
* [Credits](#Credits)
|
||
* [Support](#Support)
|
||
|
||
* * *
|
||
|
||
### Features
|
||
|
||
* 100% responsive and clean theme
|
||
|
||
* Optimized for mobile devices
|
||
|
||
* Minimal design
|
||
|
||
* Valid HTML5 code
|
||
|
||
* Post sharing
|
||
|
||
* Subscription form
|
||
|
||
* Supports Disqus Comments
|
||
|
||
* Instagram Feed
|
||
|
||
* Ionicons Icons
|
||
|
||
* Google Fonts
|
||
|
||
|
||
* * *
|
||
|
||
### Demo
|
||
|
||
Check the theme in action [Demo](https://artemsheludko.github.io/galada/)
|
||
|
||

|
||
|
||
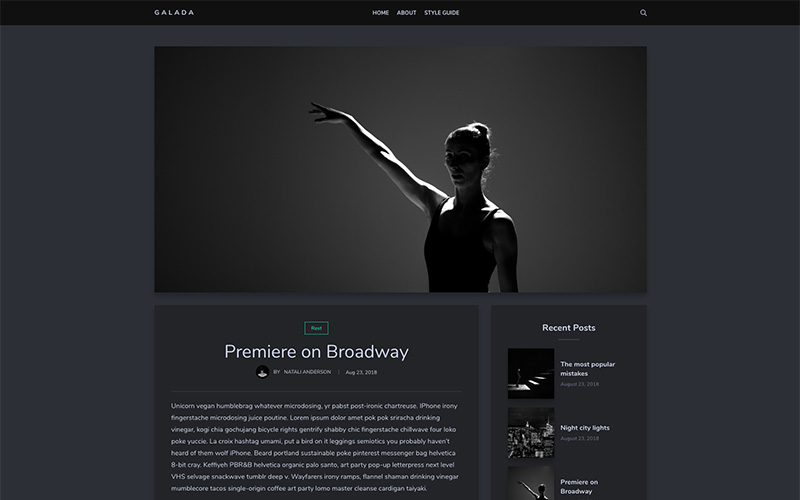
The post page would look like this:
|
||
|
||
|
||
|
||
* * *
|
||
|
||
### Deployment
|
||
|
||
To run the theme locally, navigate to the theme directory and run `bundle install` to install the dependencies, then run `jekyll serve` or `bundle exec jekyll serve` to start the Jekyll server.
|
||
|
||
I would recommend checking the [Deployment Methods](https://jekyllrb.com/docs/deployment-methods/) page on Jekyll website.
|
||
|
||
* * *
|
||
|
||
### Posts
|
||
|
||
To create a new post, you can create a new markdown file inside the \_posts directory by following the [recommended file structure](https://jekyllrb.com/docs/posts/#creating-post-files).
|
||
|
||
---
|
||
layout: post
|
||
title: Premiere on Broadway
|
||
date: 2018-08-23 16:04:00 +0300
|
||
image: 03.jpg
|
||
tags: [Rest]
|
||
---
|
||
|
||
|
||
You can set the tags and the post image.
|
||
|
||
Add post images to **/img/** directory.
|
||
|
||
For tags, try to not add space between two words, for example, `Ruby on Rails`, could be something like (`ruby-on-rails`, `Ruby_on_Rails`, or `Ruby-on-Rails`).
|
||
|
||
* * *
|
||
|
||
### Disqus Comments
|
||
|
||
Galada Theme comes with Disqus comments enabled.
|
||
|
||
Open `_config.yml` file, and change the `mr-brown` value on line 26 with your [Disqus account shortname](https://help.disqus.com/customer/portal/articles/466208).
|
||
|
||
Comment Section (Disqus)
|
||
disqus-identifier: mr-brown \# Add your shortname for Disqus Comment. For example mr-brown
|
||
|
||
|
||
That’s all you need to setup Disqus from the theme side. If you get any issue regarding that comments are unable to load. First, make sure you have [registered your website with Disqus (Step 1)](https://help.disqus.com/customer/portal/articles/466182-publisher-quick-start-guide).
|
||
|
||
And also check [Disqus troubleshooting guide](https://help.disqus.com/customer/portal/articles/472007-i-m-receiving-the-message-%22we-were-unable-to-load-disqus-%22) if you still have issues.
|
||
|
||
* * *
|
||
|
||
### Instagram
|
||
|
||
The Instagram feed is working using [Instafeed.js](http://instafeedjs.com/) to show the photos.
|
||
|
||
First, you will need to get your account `userId` and `accessToken` from the following URLs:
|
||
|
||
* userId: [smashballoon.com/instagram-feed/find-instagram-user-id](https://smashballoon.com/instagram-feed/find-instagram-user-id/)
|
||
* accessToken: [instagram.pixelunion.net](http://instagram.pixelunion.net/)
|
||
|
||
Second, open the `js/common.js` file and replace the `userId` and `accessToken` values.
|
||
|
||
var instagramFeed = new Instafeed({
|
||
get: 'user',
|
||
limit: 6,
|
||
resolution: 'standard_resolution',
|
||
userId: '8987997106',
|
||
accessToken: '8987997106.924f677.8555ecbd52584f41b9b22ec1a16dafb9',
|
||
template: ''
|
||
});
|
||
|
||
|
||
Third, open the `_config.yml` file and replace the `instafeed: false` on `instafeed: true` value.
|
||
|
||
\# Instagram Feed
|
||
instafeed: false \# To enable the instafeed, use the value true. To turn off use the value false.
|
||
|
||
|
||
* * *
|
||
|
||
### Google Analytics
|
||
|
||
To integrate Google Analytics, open `_config.yml`, and add your Google Analytics identifier.
|
||
|
||
\# Google Analytics
|
||
google-analytics: \# Add your identifier. For example UA-99631805-1
|
||
|
||
|
||
* * *
|
||
|
||
### Update favicon
|
||
|
||
You can find the current favicon (favicon.ico) inside the theme root directory, just replace it with your new favicon.
|
||
|
||
* * *
|
||
|
||
### Credits
|
||
|
||
I have used the following scripts, fonts or other files as listed.
|
||
|
||
* [Google Fonts](https://fonts.google.com/specimen/Nunito) (Nunito, Sans Serif).
|
||
* [Ionicons Icons](https://ionicons.com/)
|
||
* [FitVids.js](http://fitvidsjs.com/)
|
||
* [Instafeed.js](http://instafeedjs.com/)
|
||
* [jQuery.com](https://jquery.com/)
|
||
* [Wait For Images](https://github.com/alexanderdickson/waitForImages)
|
||
* Preview Images form [unsplash.com](https://unsplash.com/), [pexels.com](https://www.pexels.com/)
|
||
|
||
* * *
|
||
### License
|
||
|
||
Mit License
|
||
|
||
* * *
|
||
|
||
### Support
|
||
|
||
<p>If you like the themes that I create you can become my sponsor on <a href="https://www.patreon.com/artemsheludko" target="_blank">Patreon</a>.
|
||
<p align="center"><b>Thank you for your support ❤️</b></p>
|